Connect Facebook lead ads
Connect your Facebook Pages so lead form submissions land in the CRM on their own, and do the one step on Meta's side that decides whether the leads actually arrive.
This connects your Facebook Pages to ViveLead so that every lead form submission on an ad becomes a lead in the CRM within seconds. The clicking takes about two minutes. There is one more step inside Meta’s own settings that most people miss, and without it Meta accepts the connection and then quietly delivers nothing, so do not stop at the green badge.
Before you start
- Facebook and Meta lead ads are on the Professional plan and above. See pricing.
- Only an admin can connect Facebook. Anyone else sees Admin only on the card instead of the button.
- You need to be an admin of the Facebook Page, and to know which Facebook account owns it.
- Have access to business.facebook.com for the same business. The last step happens there, not in ViveLead.
Steps
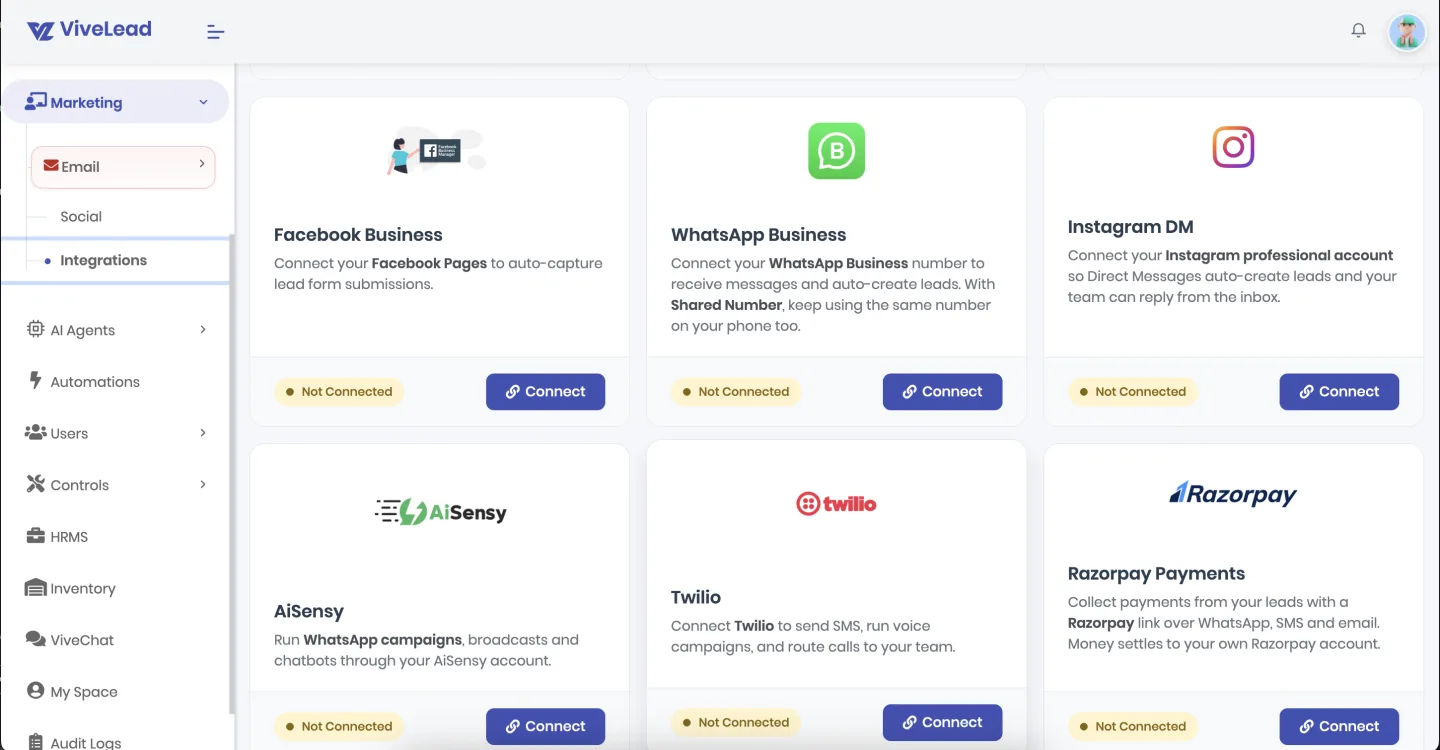
Open Marketing, then Integrations in the left sidebar, and find the Facebook Business card. Click Connect.
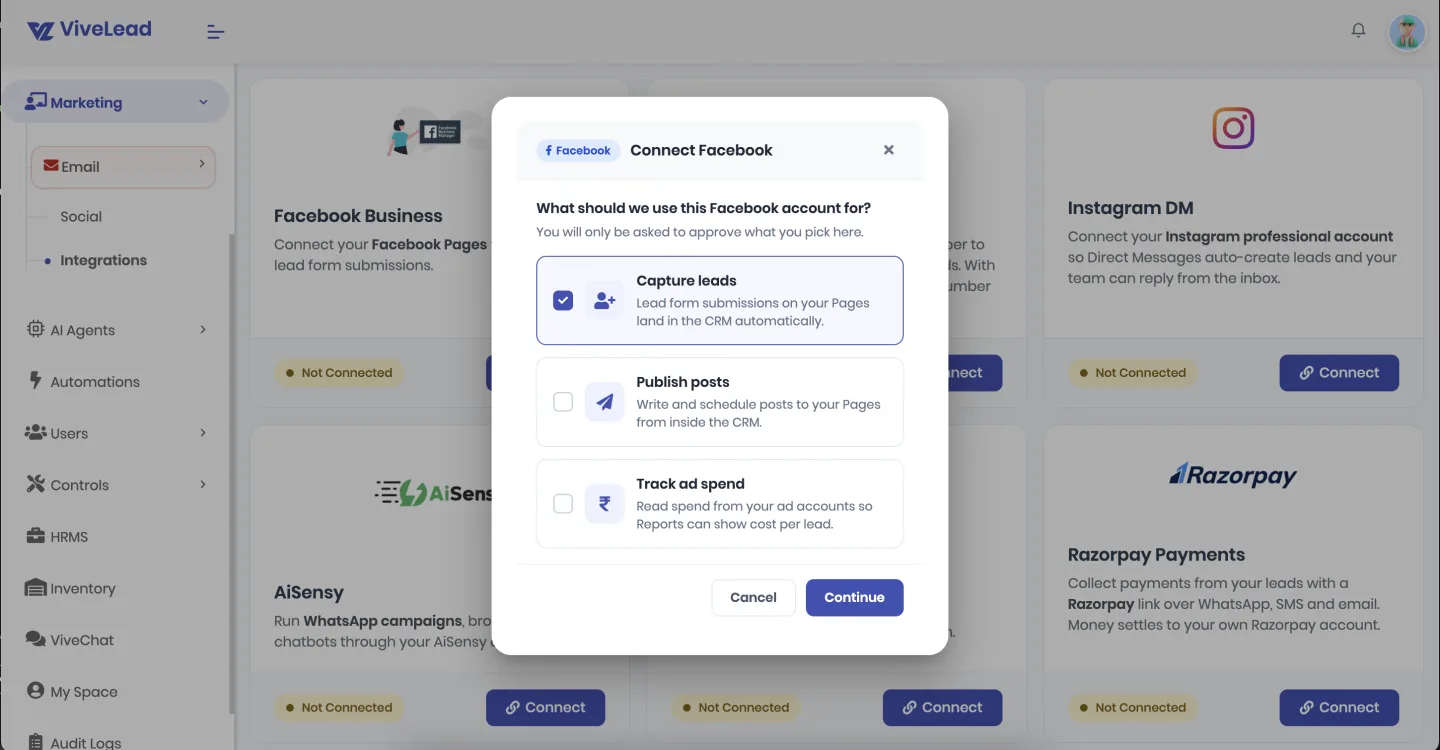
Answer what the account is for. A dialog asks “What should we use this Facebook account for?” with three options. Capture leads is already ticked, and it is the only one needed for lead ads. Tick Publish posts or Track ad spend only if you want those too, because each one adds a permission to the Facebook screen that follows. Click through when the tick is right.
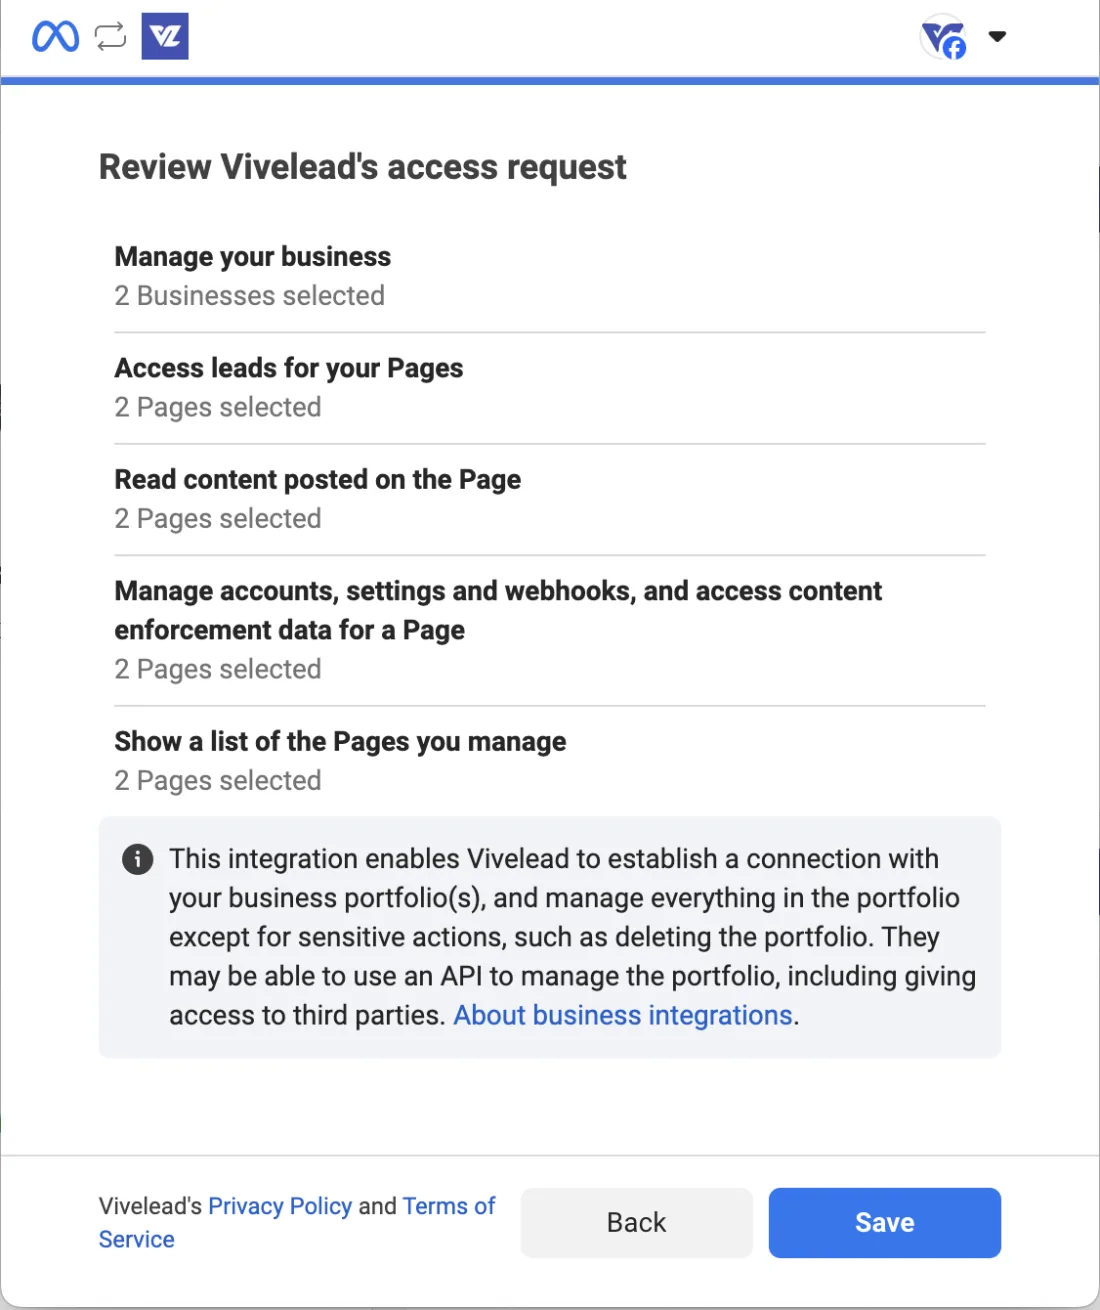
Work through Facebook’s window. It is Facebook’s own, so it looks like Facebook and not like ViveLead. Log in, and when it lists your Pages, leave every Page you want leads from ticked. A Page you untick here is not connected, and its leads will not arrive.
Before it finishes, Facebook shows you exactly what it is about to grant. Access leads for your Pages is the one that matters here.
Come back and check the card. You should see Facebook connected successfully and the status badge reading Connected, with a chip for each Page showing Active.
If a toast says 1 page not connected (or more), that Page failed to subscribe and the reason is printed next to its name. The other Pages still work. Run Connect again for that one.
Now do the Lead Access Manager step below. The card says Connected at this point whether or not leads will actually be delivered, so this next step is not optional.
The step that decides whether leads arrive
Meta keeps a separate list of which CRMs are allowed to receive a Page’s leads. Connecting in ViveLead does not add us to it, and Meta does not warn you. If ViveLead is not on that list, your ads run, people submit the form, and nothing reaches the CRM.
- Go to business.facebook.com and open Settings for your business portfolio.
- In the left menu, open Integrations, then Leads access.
- Pick your Page from the list. The panel on the right opens on that Page’s leads access.
- Open the CRMs tab, click Assign CRM, search for ViveLead, and assign it.
It has worked when ViveLead is listed under CRMs with leads access, with a Remove button beside it.
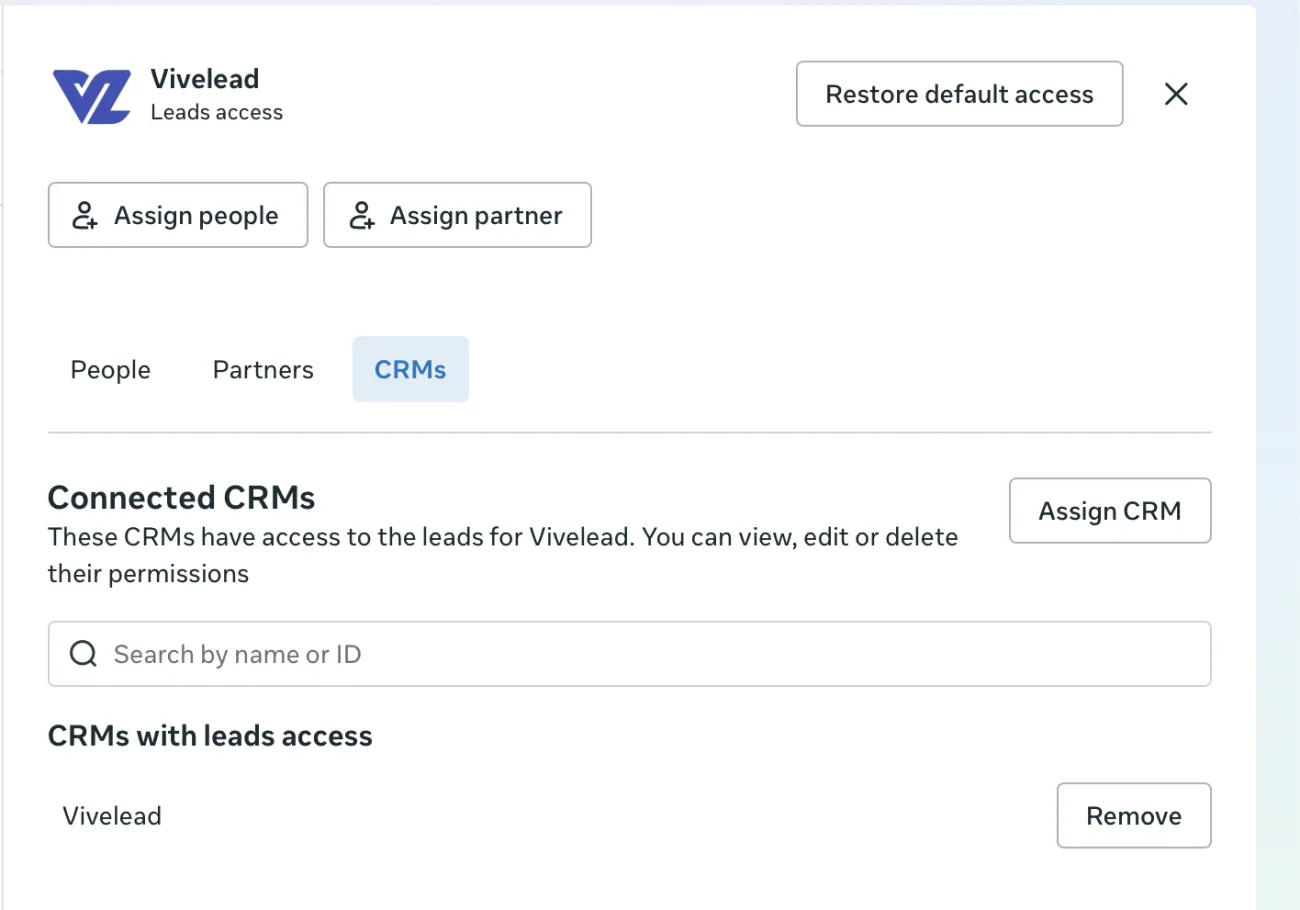
If ViveLead does not come up in that search, the connect step did not finish for this Page. Go back to the Facebook Business card and run Connect again for it, then search again. The entry only becomes findable once the Page is properly subscribed.
If Facebook instead raises a request asking you to give an app full access to your business portfolio, do not approve it. That is a different thing from adding a CRM, and it is not something we ask for. Write to us at contact@vivelead.com and we will sort it with you.
Check it before you spend on the ad
Open Meta’s Lead Ads Testing Tool and pick the Page. Page Diagnostics at the top should show three green ticks: User has Leads Permission, Lead Access Manager Enabled and User is Page Admin. If the middle one is not ticked, the step above is not done.

Then pick your form, click Create lead, and click Track status. The tool allows one test lead per form, so delete the old one before creating another.
Track status is the answer that counts. The per-app issue panel on the same screen keeps listing permissions even after everything is correct, because it reflects your browser session rather than the connection. Track status reads from the delivery itself. Failure with CRM access has been revoked from Lead Access Manager means the step above is not done. Once it is done, the test lead shows up in ViveLead under Leads.
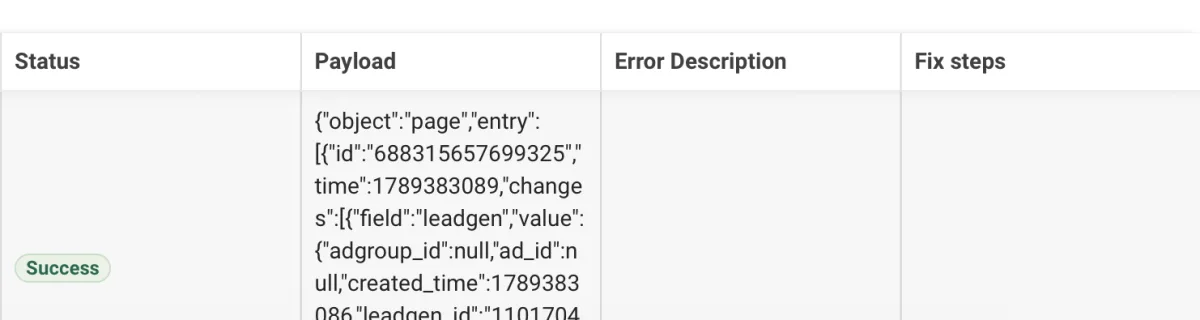
Where the lead lands
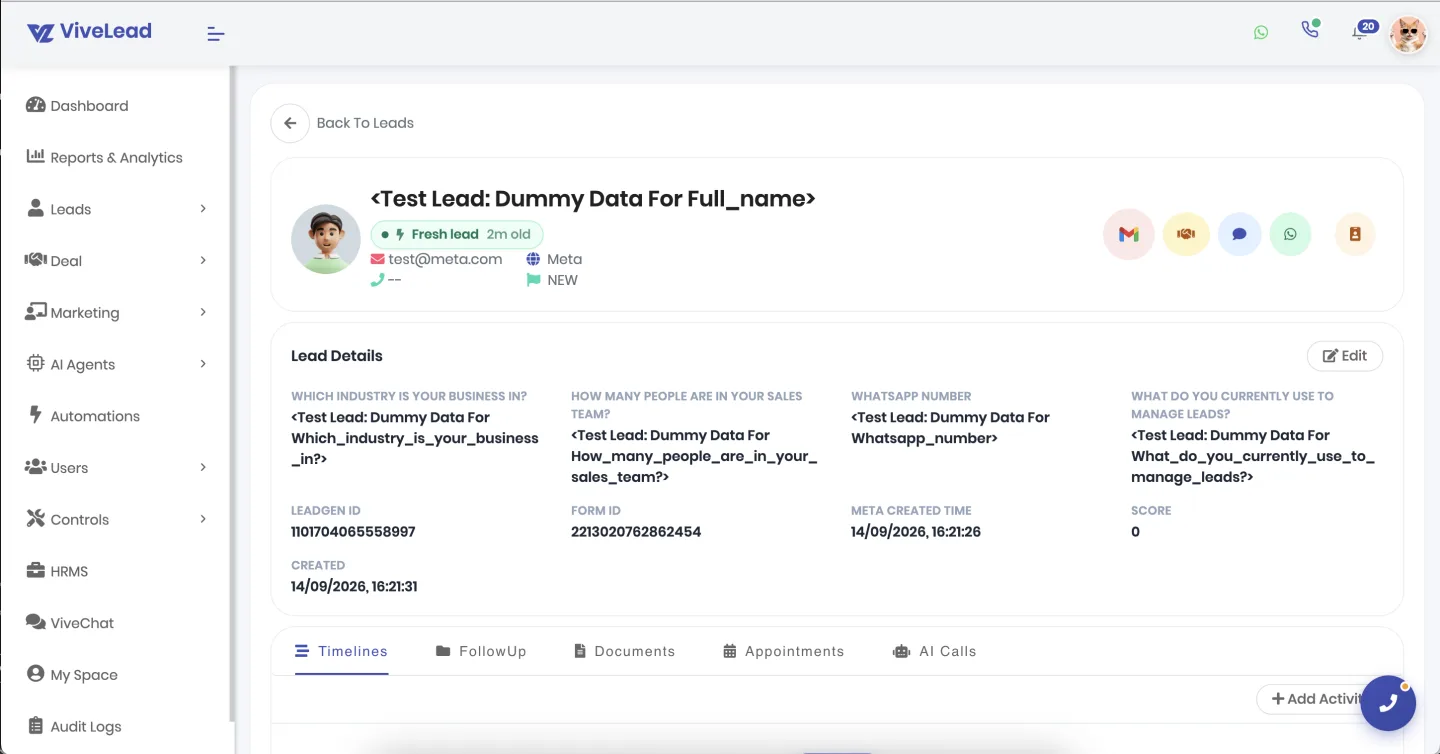
- The lead is created with its source set to Meta, so you can filter and report on it.
- Name, email and phone from the form map onto the lead’s own fields. Any other question on your form is stored under that question’s own name.
- Automations, lead scoring and the activity timeline all run exactly as they do for a lead created by hand.
- If that person already exists as a lead, the submission merges into the existing lead instead of creating a duplicate.
- The lead is recorded as created by the admin who connected that Facebook account.
- If your company has more than one location, Meta leads go to your first location.
What happens to that lead next
The lead is created through the same pipeline as one you type in by hand, so nothing after this point is a special case for Meta.
- It gets an owner from your own rules. If you have lead rotation or a distribution rule set up, that rule picks the owner. With neither, the lead arrives unassigned and sits in the list until somebody takes it, which is the usual reason a working connection still feels like nothing happened.
- Created by is not the owner. The lead is recorded as created by the admin who connected that Facebook account. That is provenance, not responsibility, and it does not put the lead on anyone’s list.
- Your automations run on it. A workflow on the Lead created trigger fires for this lead exactly as it would for any other, so the first follow-up can go out on its own within seconds of the form being submitted.
- Confirm the run rather than assuming it. Open the workflow’s row menu and choose Execution history. The run for this lead shows every step and whether it succeeded, including what the message step actually sent. See Set up your first automation.
If no automation is turned on yet, the lead still arrives correctly. It simply waits for a person, which is worth knowing before you spend on the ad.
What each status means
| What you see | What it means | What to do |
|---|---|---|
| Connected, Page chip Active | Connected our side | Finish the Lead Access Manager step, then test |
| Reconnect needed, “Lead sync is paused” | That Facebook account’s token has expired | Click Reconnect on the card and sign in again |
| Page chip Disconnected | That one Page’s token failed. Other Pages keep working | Click Reconnect and tick that Page |
| Not Connected | No Facebook account connected yet | Click Connect |
| Upgrade to connect | The plan does not include Meta lead ads | See pricing |
| Admin only | You are signed in as a non-admin | Ask an admin to connect it |
If it does not work
| What happens | What it means | What to do |
|---|---|---|
| Everything reads Connected and Active, but no leads arrive | Almost always the Lead Access Manager entry is missing | Do the step above, then confirm with Track status |
| “Facebook connect cancelled. Nothing was changed.” | The Facebook window was closed before finishing | Click Connect again. Nothing was saved, so it is safe to retry |
| A Page is missing from the list in Facebook’s window | You are not an admin of that Page, or it belongs to another business | Get Page admin access, then connect again |
| Leads arrive for one Page but not another | The second Page is either unticked or missing its own CRM entry | Lead Access Manager is per Page. Repeat the step for each one |
| Posts cannot be published after connecting | Publishing was not approved on the Facebook screen | Connect again and allow it. It does not affect lead capture |
Related
- Import your leads from a CSV or Excel file for a list you already hold.
- Connect your WhatsApp number so the AI can reply to these leads in seconds.
Still stuck on this step?
Send us what you are seeing and we will sort it out with you.