Run projects with your team
Create a project, give it a team and dates, move its to-dos across a board, and post work updates with @mentions and files, all inside ViveLead.
A project holds one piece of work your team delivers: its people, its dates, a board of to-dos and a feed of work updates. Use it for what happens after the sale, like a website build, an installation or a print order. Setting up your first project takes about two minutes.
Before you start
- Projects is an add-on. It is not part of a plan by itself. Ask us to turn it on for your account.
- Who can use it: the admin can do everything. Anyone else needs the project permissions on their role, see Give your team access.
- Who sees a project: its owner, its members, the person who created it and the admin. A branch admin also sees the projects of their branch.
- On the phone: the ViveLead app does not have Projects yet. Open the dashboard in your phone’s browser; the project page fits a phone screen.
1. Create a project
Click Projects in the sidebar, then New project.

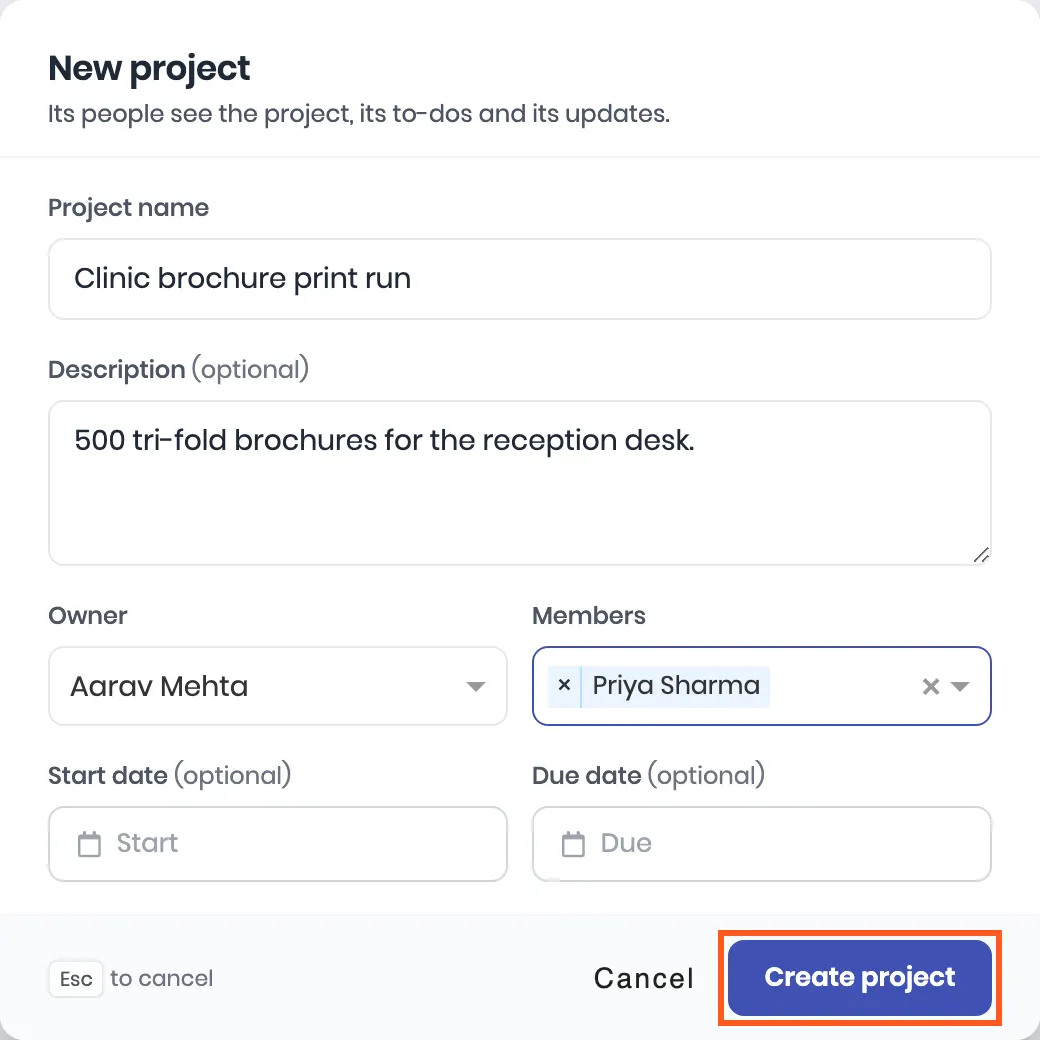
Fill in the project. Give it a name, and a description if it helps. Owner starts on you. Under Members, pick everyone who works on it. Add a start and due date if the work has a deadline.
Click Create project. The project opens. Each member gets an Added to a project notification.
2. Read the project page
The top of the page shows the owner, the team, the dates with the days left, and how many to-dos are done. Below it are two tabs: To-dos and Updates.
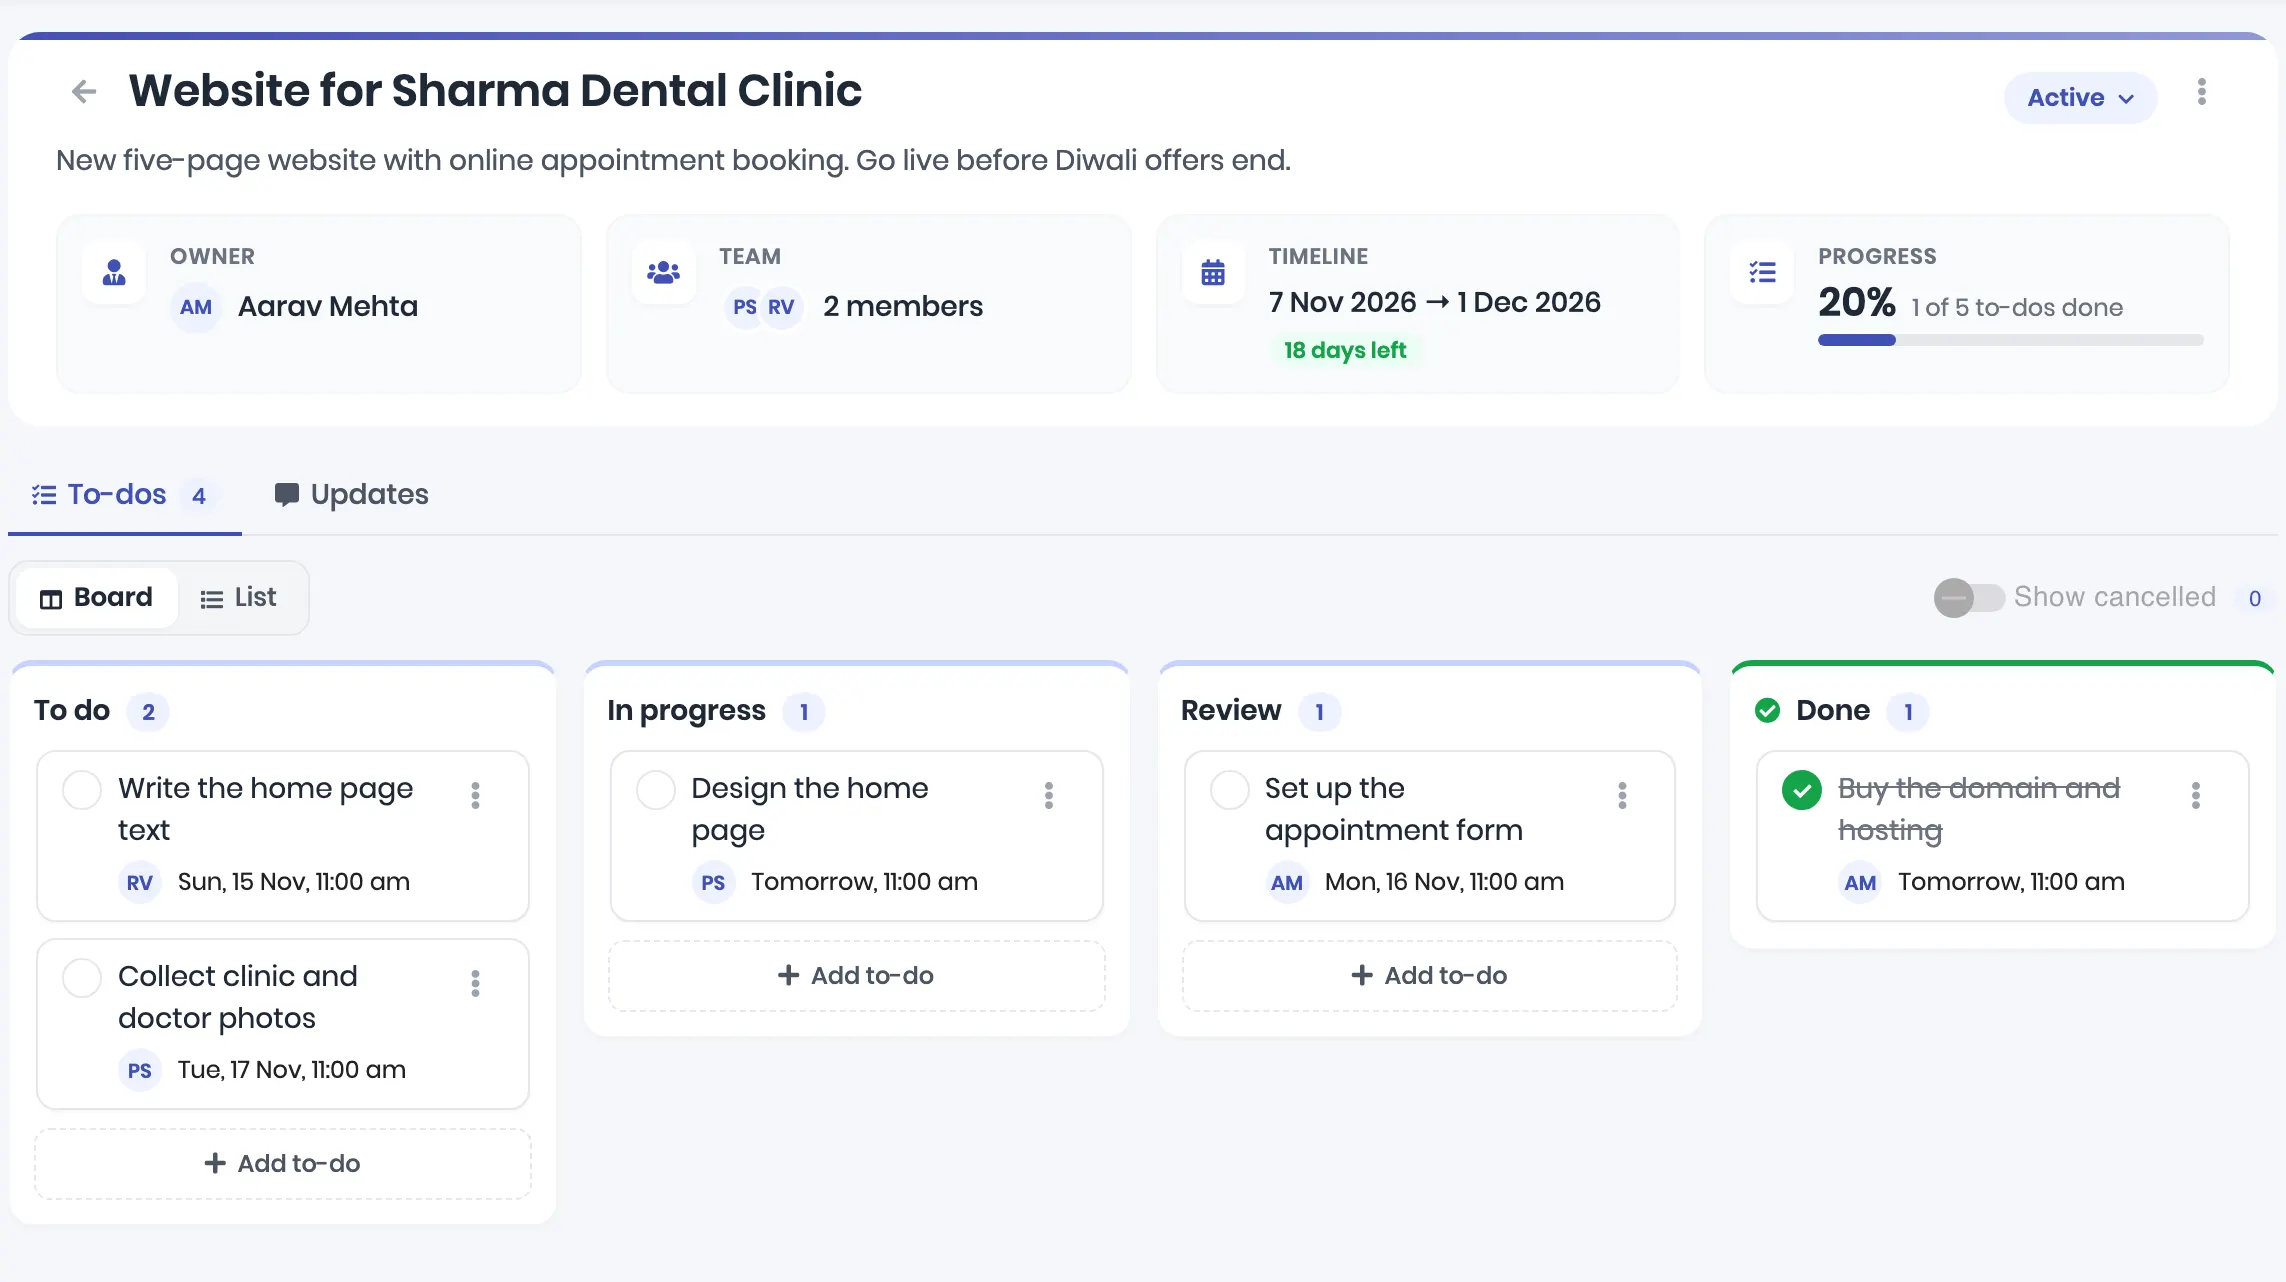
- The days left turn amber in the last 3 days and red once the due date has passed.
- Progress counts the to-dos that are done out of all of them. Cancelled to-dos do not count.
- To change the status, click it at the top right, for example Active, and pick another.
3. Work the board
Every project starts with four columns: To do, In progress, Review and Done.
Add a to-do. Click Add to-do under a column. Give it a title, a due time and the person it is for. It shows on the board and on that person’s Tasks page.
Move it along. Drag the card to the next column. Every column the card can go to gets a dashed border, and the one under your pointer turns blue. On a phone, press and hold the card for a moment before you drag.
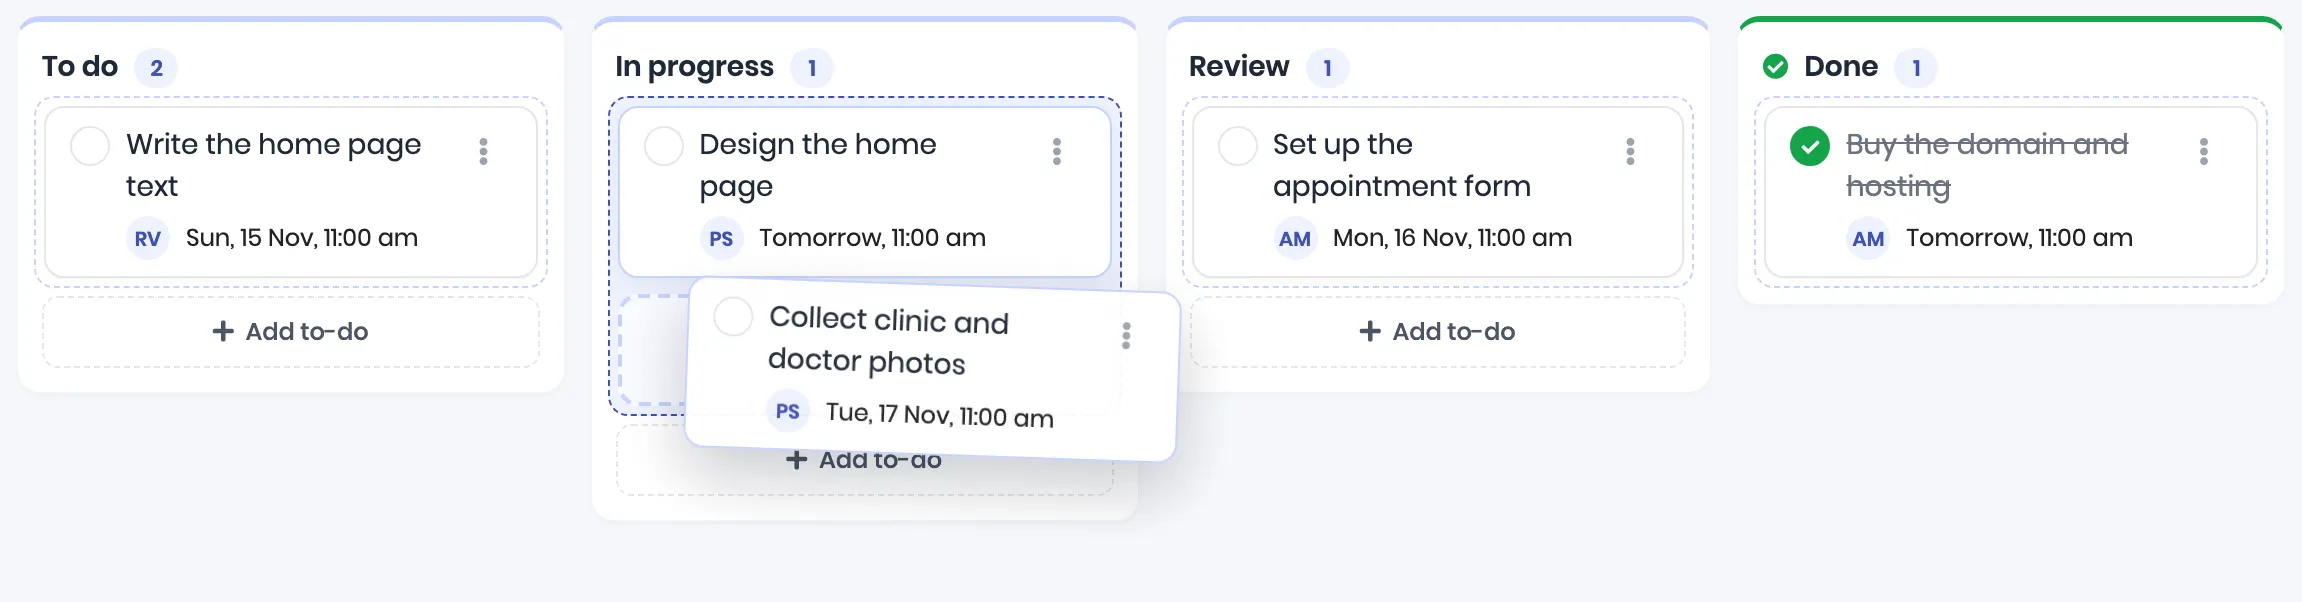
Finish it. Drag the card into Done, or click the circle on the card. Either way the to-do is done and the progress goes up. To open it again, drag it out of Done or click its green tick.
List at the top of the board shows the same columns one under the other. Show cancelled brings back to-dos that were cancelled.
4. Change the columns
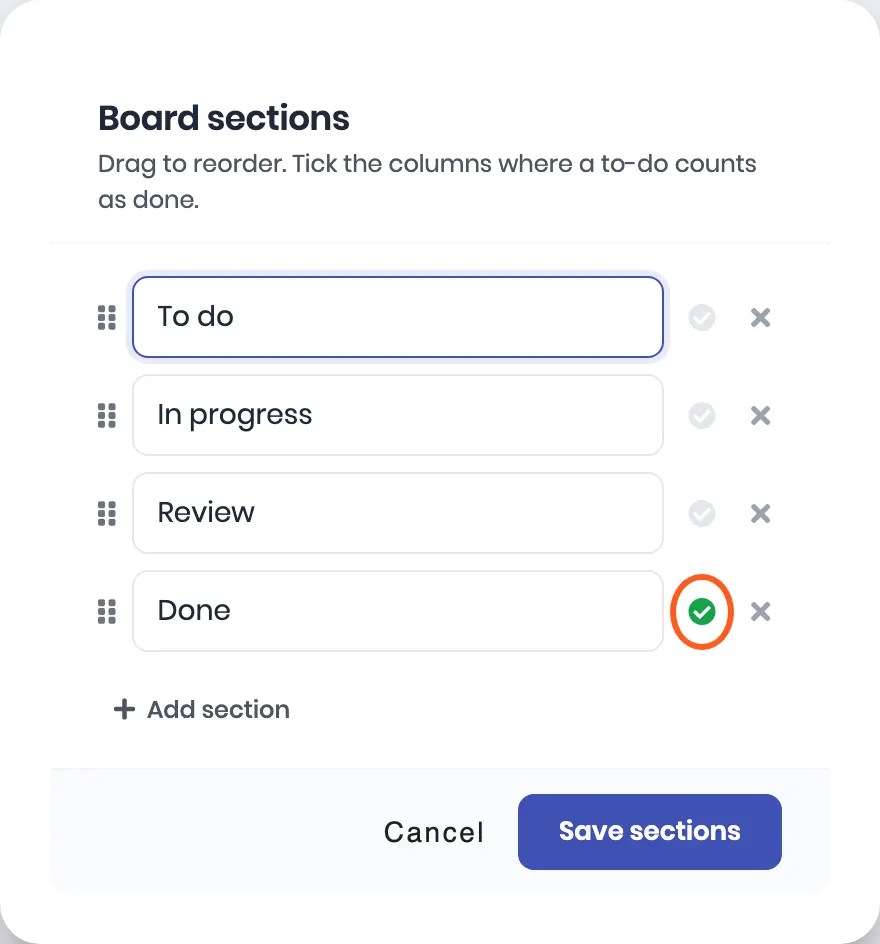
- Click ⋮ at the top right of the project, then Board sections.
- Rename, add, remove or drag columns into order. To-dos in a column you remove move to the first column.
- Tick ✓ next to a column to make it a done column. A to-do dragged into a done column counts as done. A project can have up to two, for example Done and Cancelled.
- Click Save sections.
Columns belong to one project. Changing them here does not change any other project.
5. Post work updates
The Updates tab is the project’s feed: what got done, what is stuck, what is next.
Write the update. Type @ and the start of a name to mention someone on the project. Pick them with the arrow keys and Enter, or click the name.

Attach files if you need to. Click the clip below the box. You can add up to 10 files to one update, each up to 10 MB.
Click Post, or press Ctrl + Enter.

The update shows at the top of the feed with the mentioned names in blue. Anyone on the project can open the files.

Who hears about it:
- Each person you mention gets You were mentioned.
- The rest of the project’s people get New project update.
- You can delete your own update. The admin can delete any update.
6. Set your company’s project statuses
Each project has a status, such as Active, On hold or Completed. The admin decides which statuses your company uses.
- On the Projects page, click the gear next to New project. Only the admin sees it.
- Rename, recolour, add or drag statuses into order. New projects start at the first status. The last status means done, so a project there never shows as late.
- Click Save statuses.
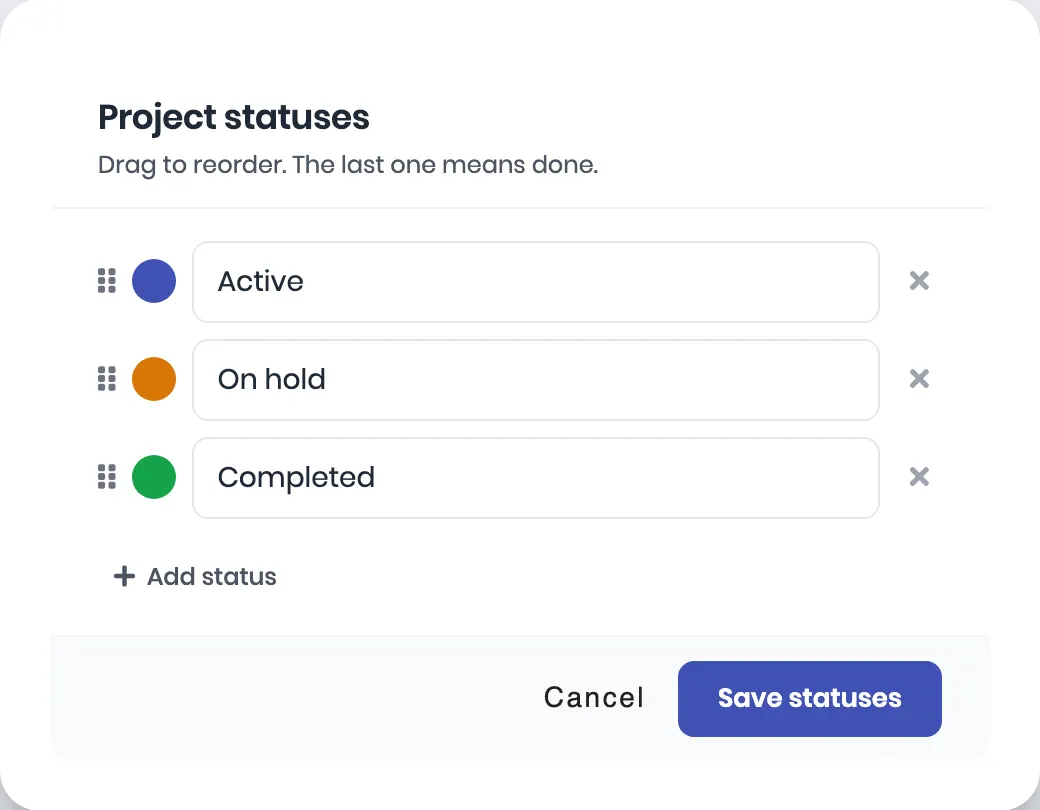
You need at least two statuses. A status that a project is still at cannot be removed: move those projects to another status first.
Give your team access
- Open Users, then Roles, and edit the role. See Add your team and set roles.
- Under Projects, tick what the role may do: Project Read, Project Create, Project Update, Project Delete and Post Work Updates.
- For to-dos, tick the Task permissions too. A project’s to-dos are tasks, so adding, moving and closing them needs Task Create and Task Update.
Someone with Project Read still sees only the projects they own, are a member of or created.
If it does not work
- Projects is not in the sidebar. The add-on is not on for your account yet, or your role has no Project Read.
- You cannot move a card. Your role needs Task Update.
- Nobody comes up after @. Only the project’s owner and members can be mentioned. Add the person to the project first with ⋮, then Edit project.
- A status will not delete. Some projects are still at it. Filter the Projects page by that status and move them first.
Still stuck on this step?
Send us what you are seeing and we will sort it out with you.