Run several branches from one ViveLead account
Add each office or branch as a location, put your people in their branch, give a branch its own Location Admin, and switch the whole dashboard to one branch at a time.
This sets ViveLead up for a business with more than one office, showroom, clinic or site. Each branch becomes a location. Your people belong to their branch, a branch manager sees only their branches, and you can look at any one branch on its own or at all of them together.
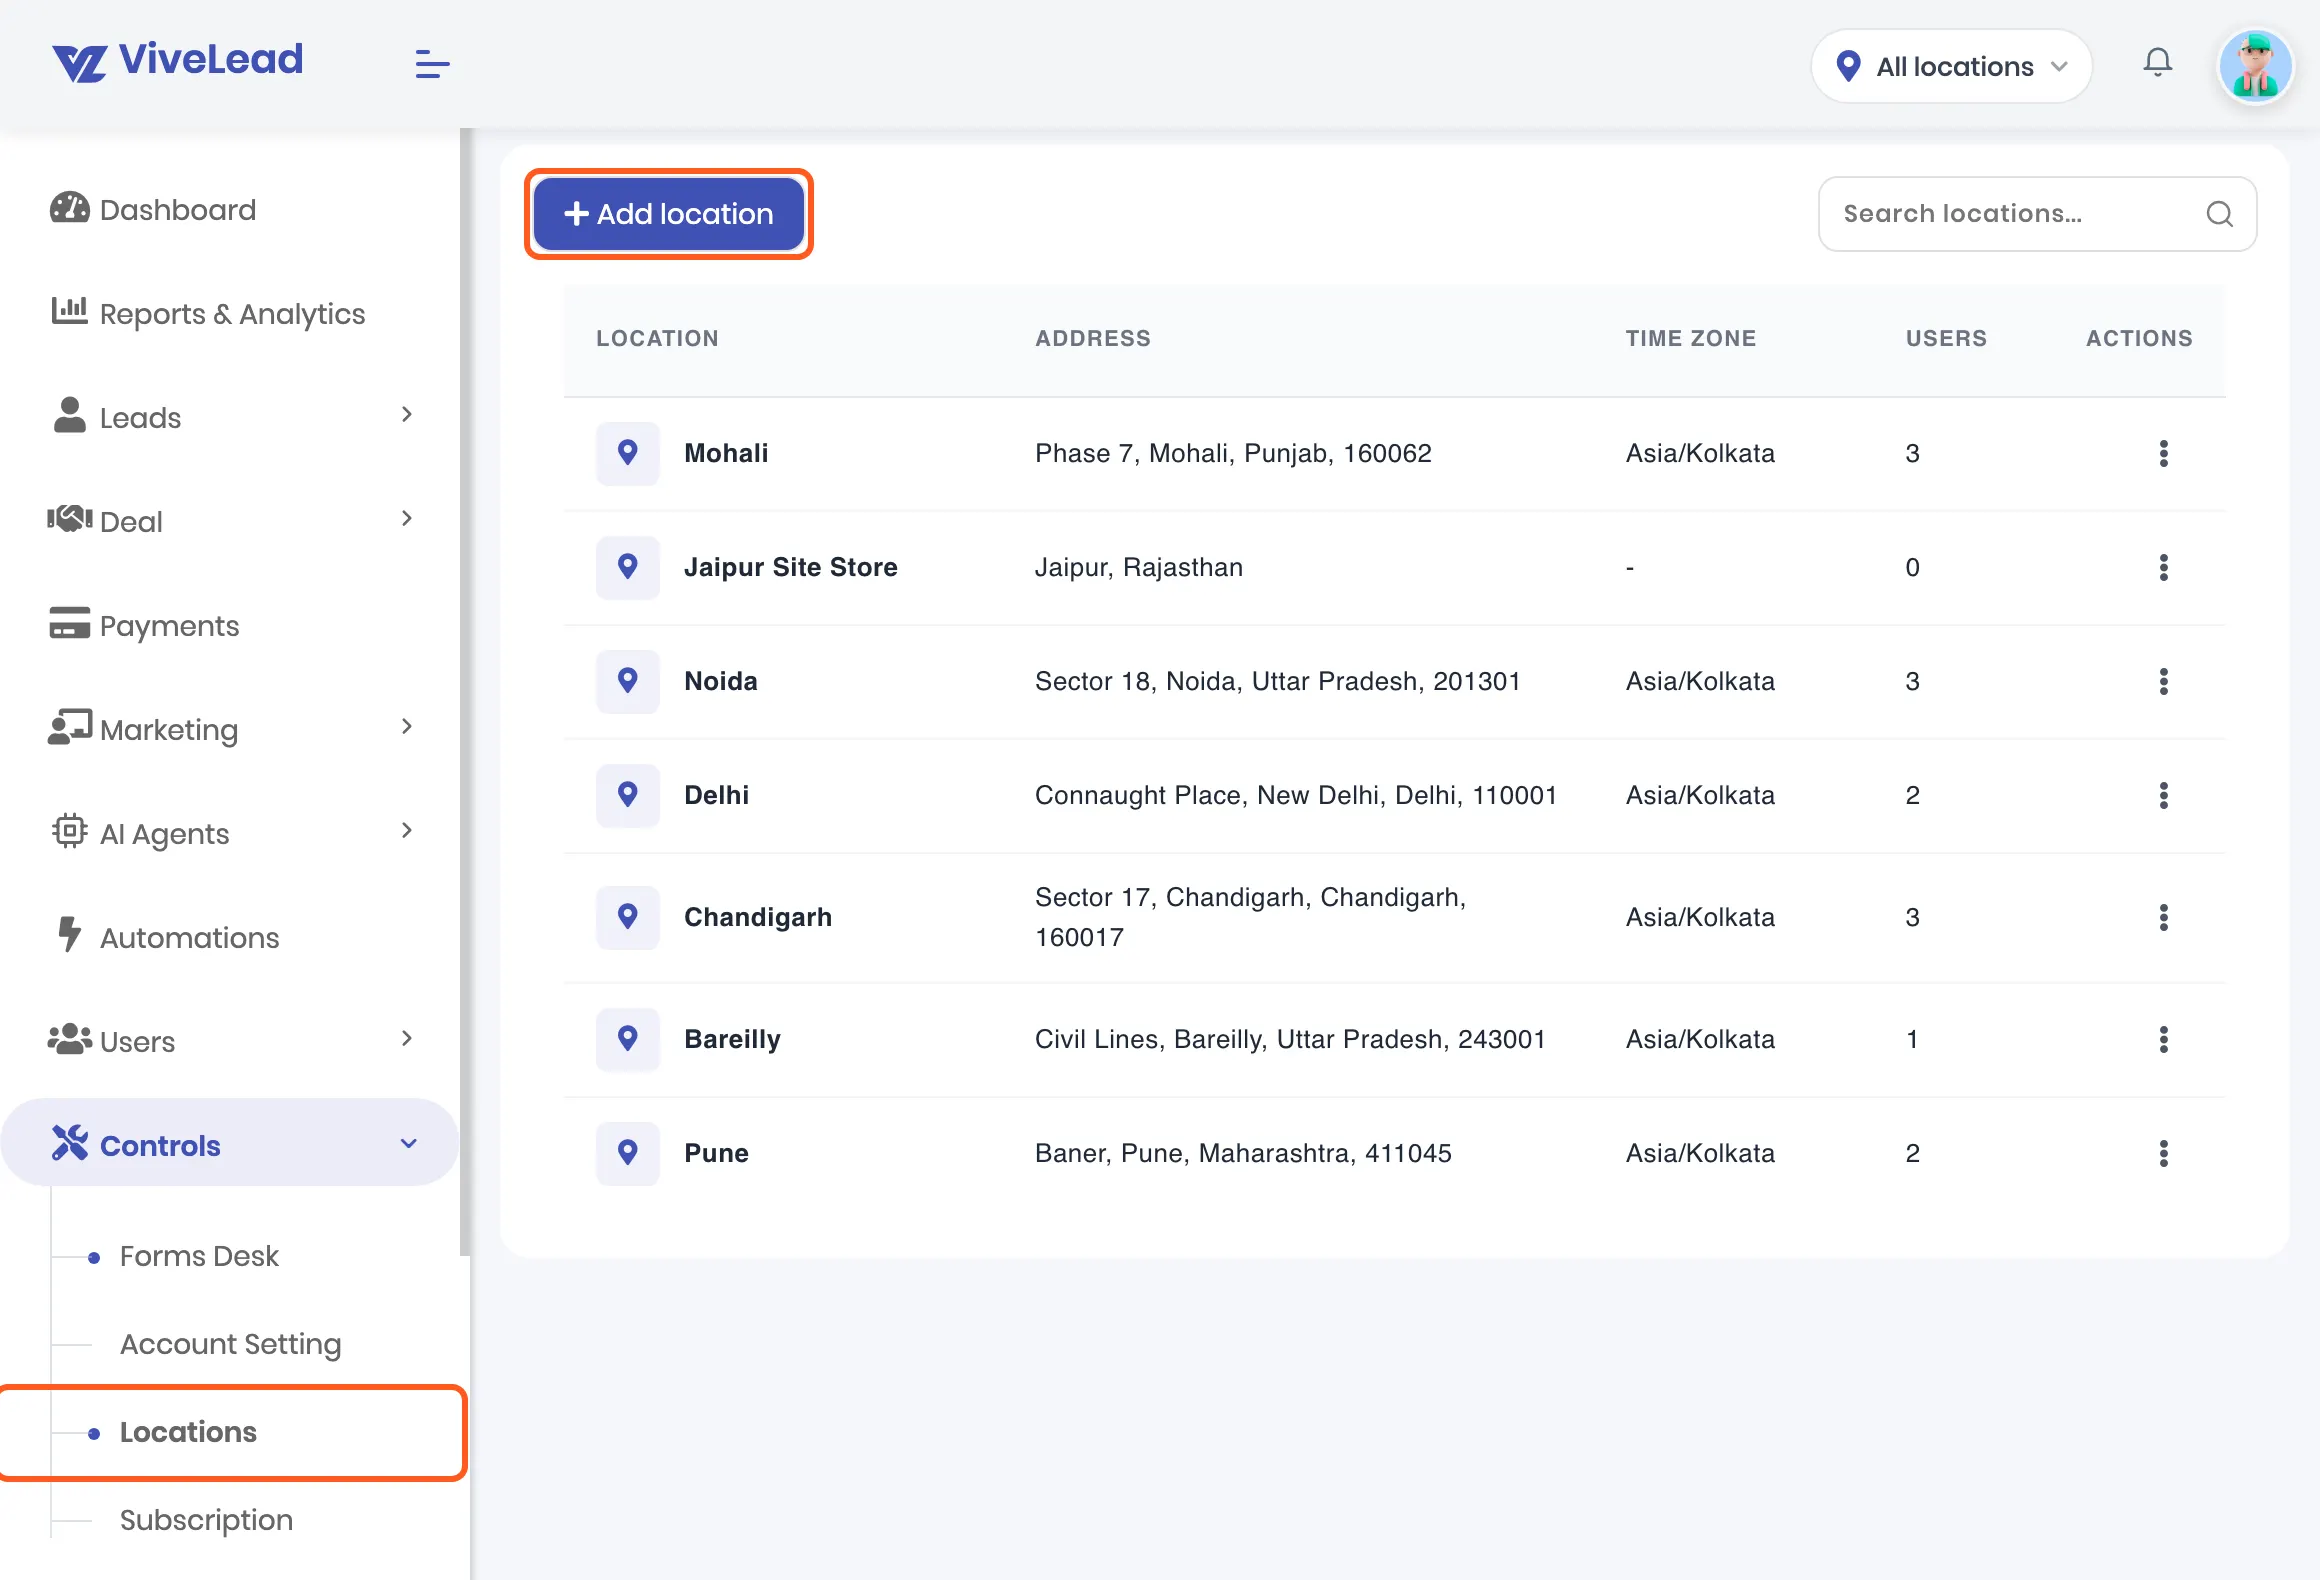
The screenshots follow one example: a company with branches in Mohali, Delhi, Noida, Chandigarh, Bareilly and Pune, adding Lucknow.
Before you start
- Plan: Business. On other plans Locations is not in the menu. See pricing.
- Who can do it: an admin.
- You already have one location. Every account starts with one, so your existing users and leads are already in it. Rename it in step 1 if its name is not a real branch.
1. Add your branches
Open Controls, then Locations. The list shows each location with its address, time zone and how many users are in it. Click Add location.
Fill in the branch. Name, City, Country and Time zone are required. The name is what everyone will see in menus, so use what your team calls the branch, like Lucknow or Head office. Then click Save.
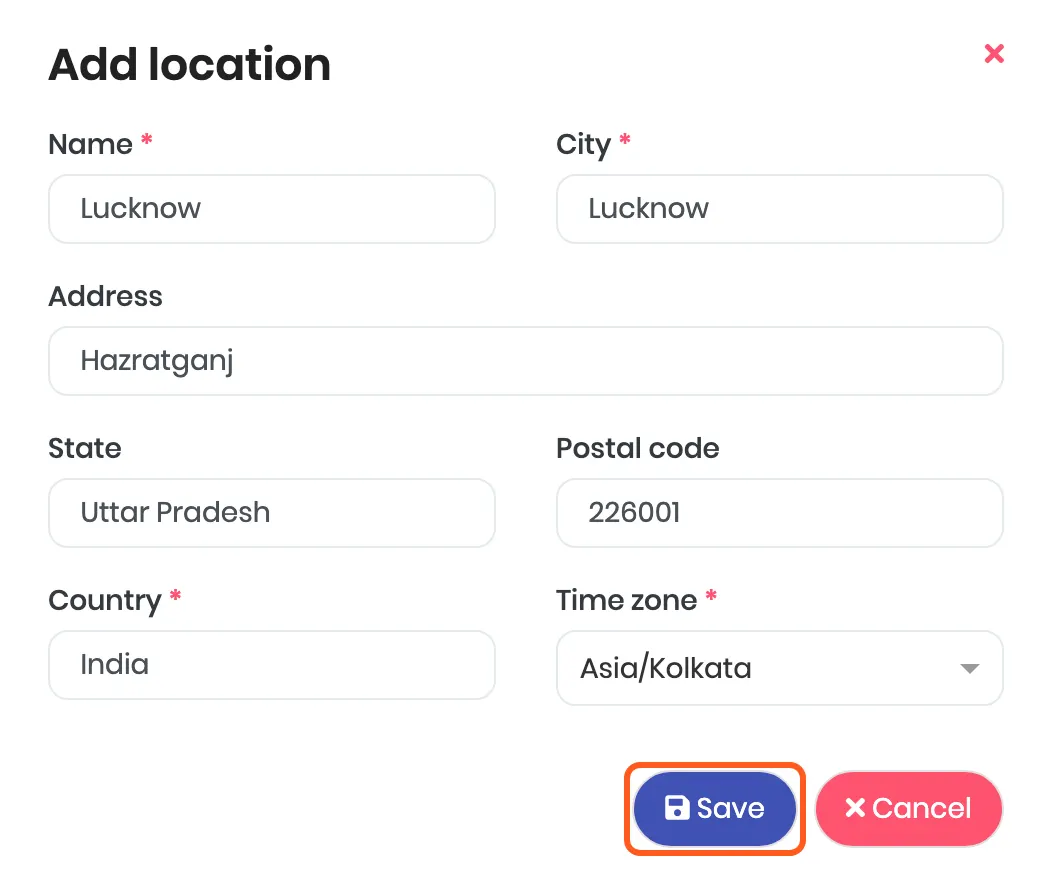
✅ Done when the branch is in the list with 0 users.
To change a branch later, click ⋮ on its row, then Edit. Delete works only on a branch with no users and no leads left in it, and never on your last one. If it refuses, the message says how many users and leads are still there. Move them first.
2. Put each person in their branch
Open Users, then User, and add or edit a person. Once your account has more than one location, the form has two fields for it:
- Location is the branch the person works from. New leads they add go there.
- Also works at is for anyone who covers more than one branch, like a regional manager.
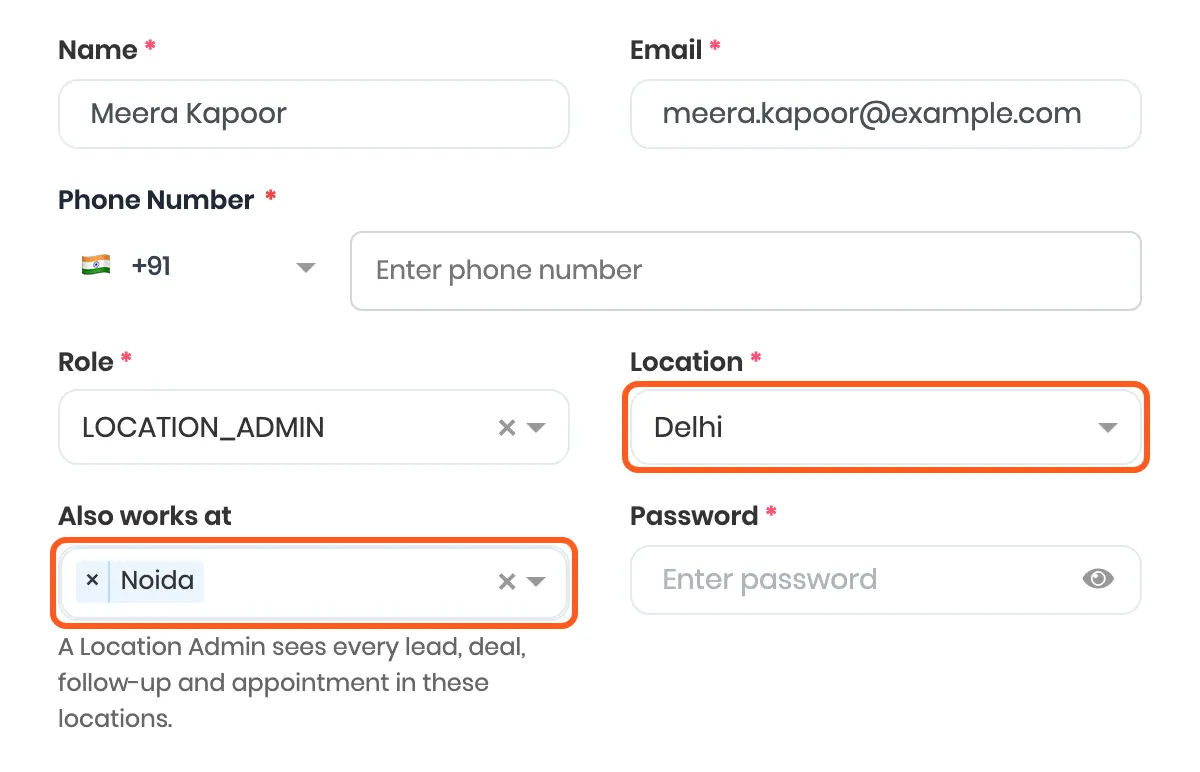
💡 The Users count on the Locations page counts a person once in each branch they are in, so someone in Delhi who also works at Noida shows under both.
3. Give a branch its own manager
A branch manager usually needs to see the whole branch, not only their own leads. That is the LOCATION_ADMIN role. It appears in the Role list once you add your first branch.
Give the manager the role LOCATION_ADMIN, their branch under Location, and any other branches they run under Also works at. They then see every lead, deal, follow-up and appointment in those branches, the people who work there, and those people’s calls in Reports. They see nothing from other branches.
| Role | Sees |
|---|---|
| Admin | Every branch |
| LOCATION_ADMIN | Everything in their Location and Also works at branches |
| Every other role | Only the leads they own or created, in any branch |
A sales rep does not see their whole branch just because they are in it. Their role decides that, the same as in a single-branch account. See Add your team and set what they can see.
4. Look at one branch at a time
Anyone who has more than one location gets a location picker at the top right of the dashboard. It starts on All locations. Pick a branch to narrow the dashboard to it.
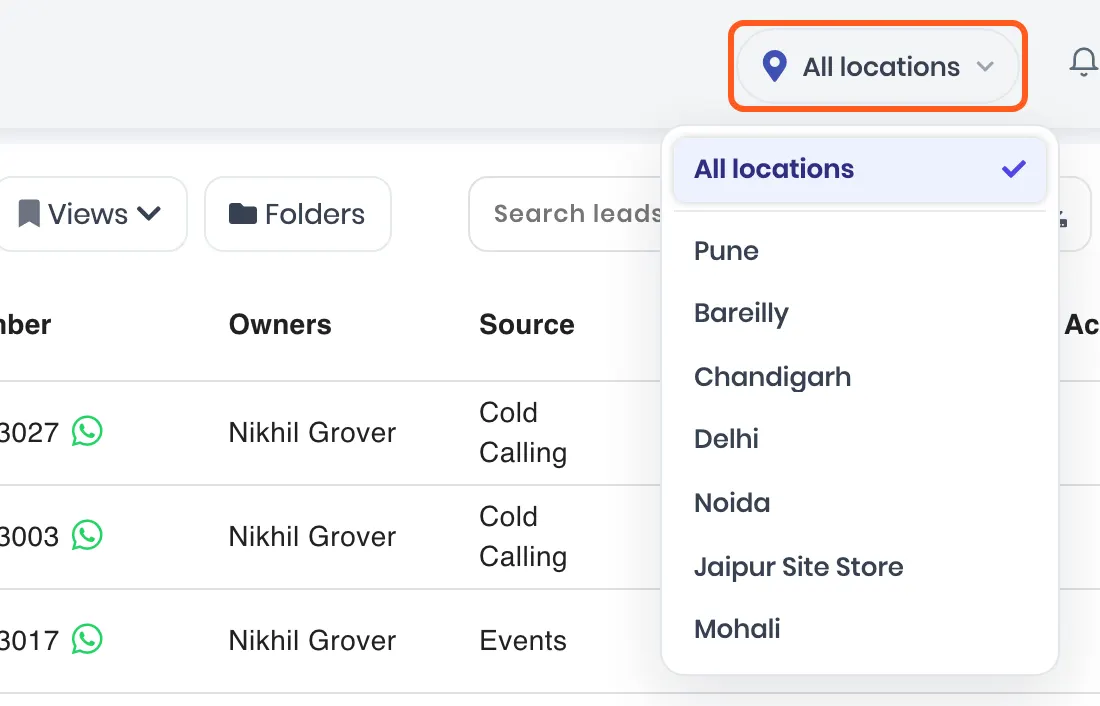
What follows the picker:
- Leads, Follow Ups, Appointments and Deals
- Reports & Analytics
- The admin Dashboard cards
- The Users list
- New leads. Add and Bulk upload CSV file new leads in the picked branch. On All locations, they go to your own Location.
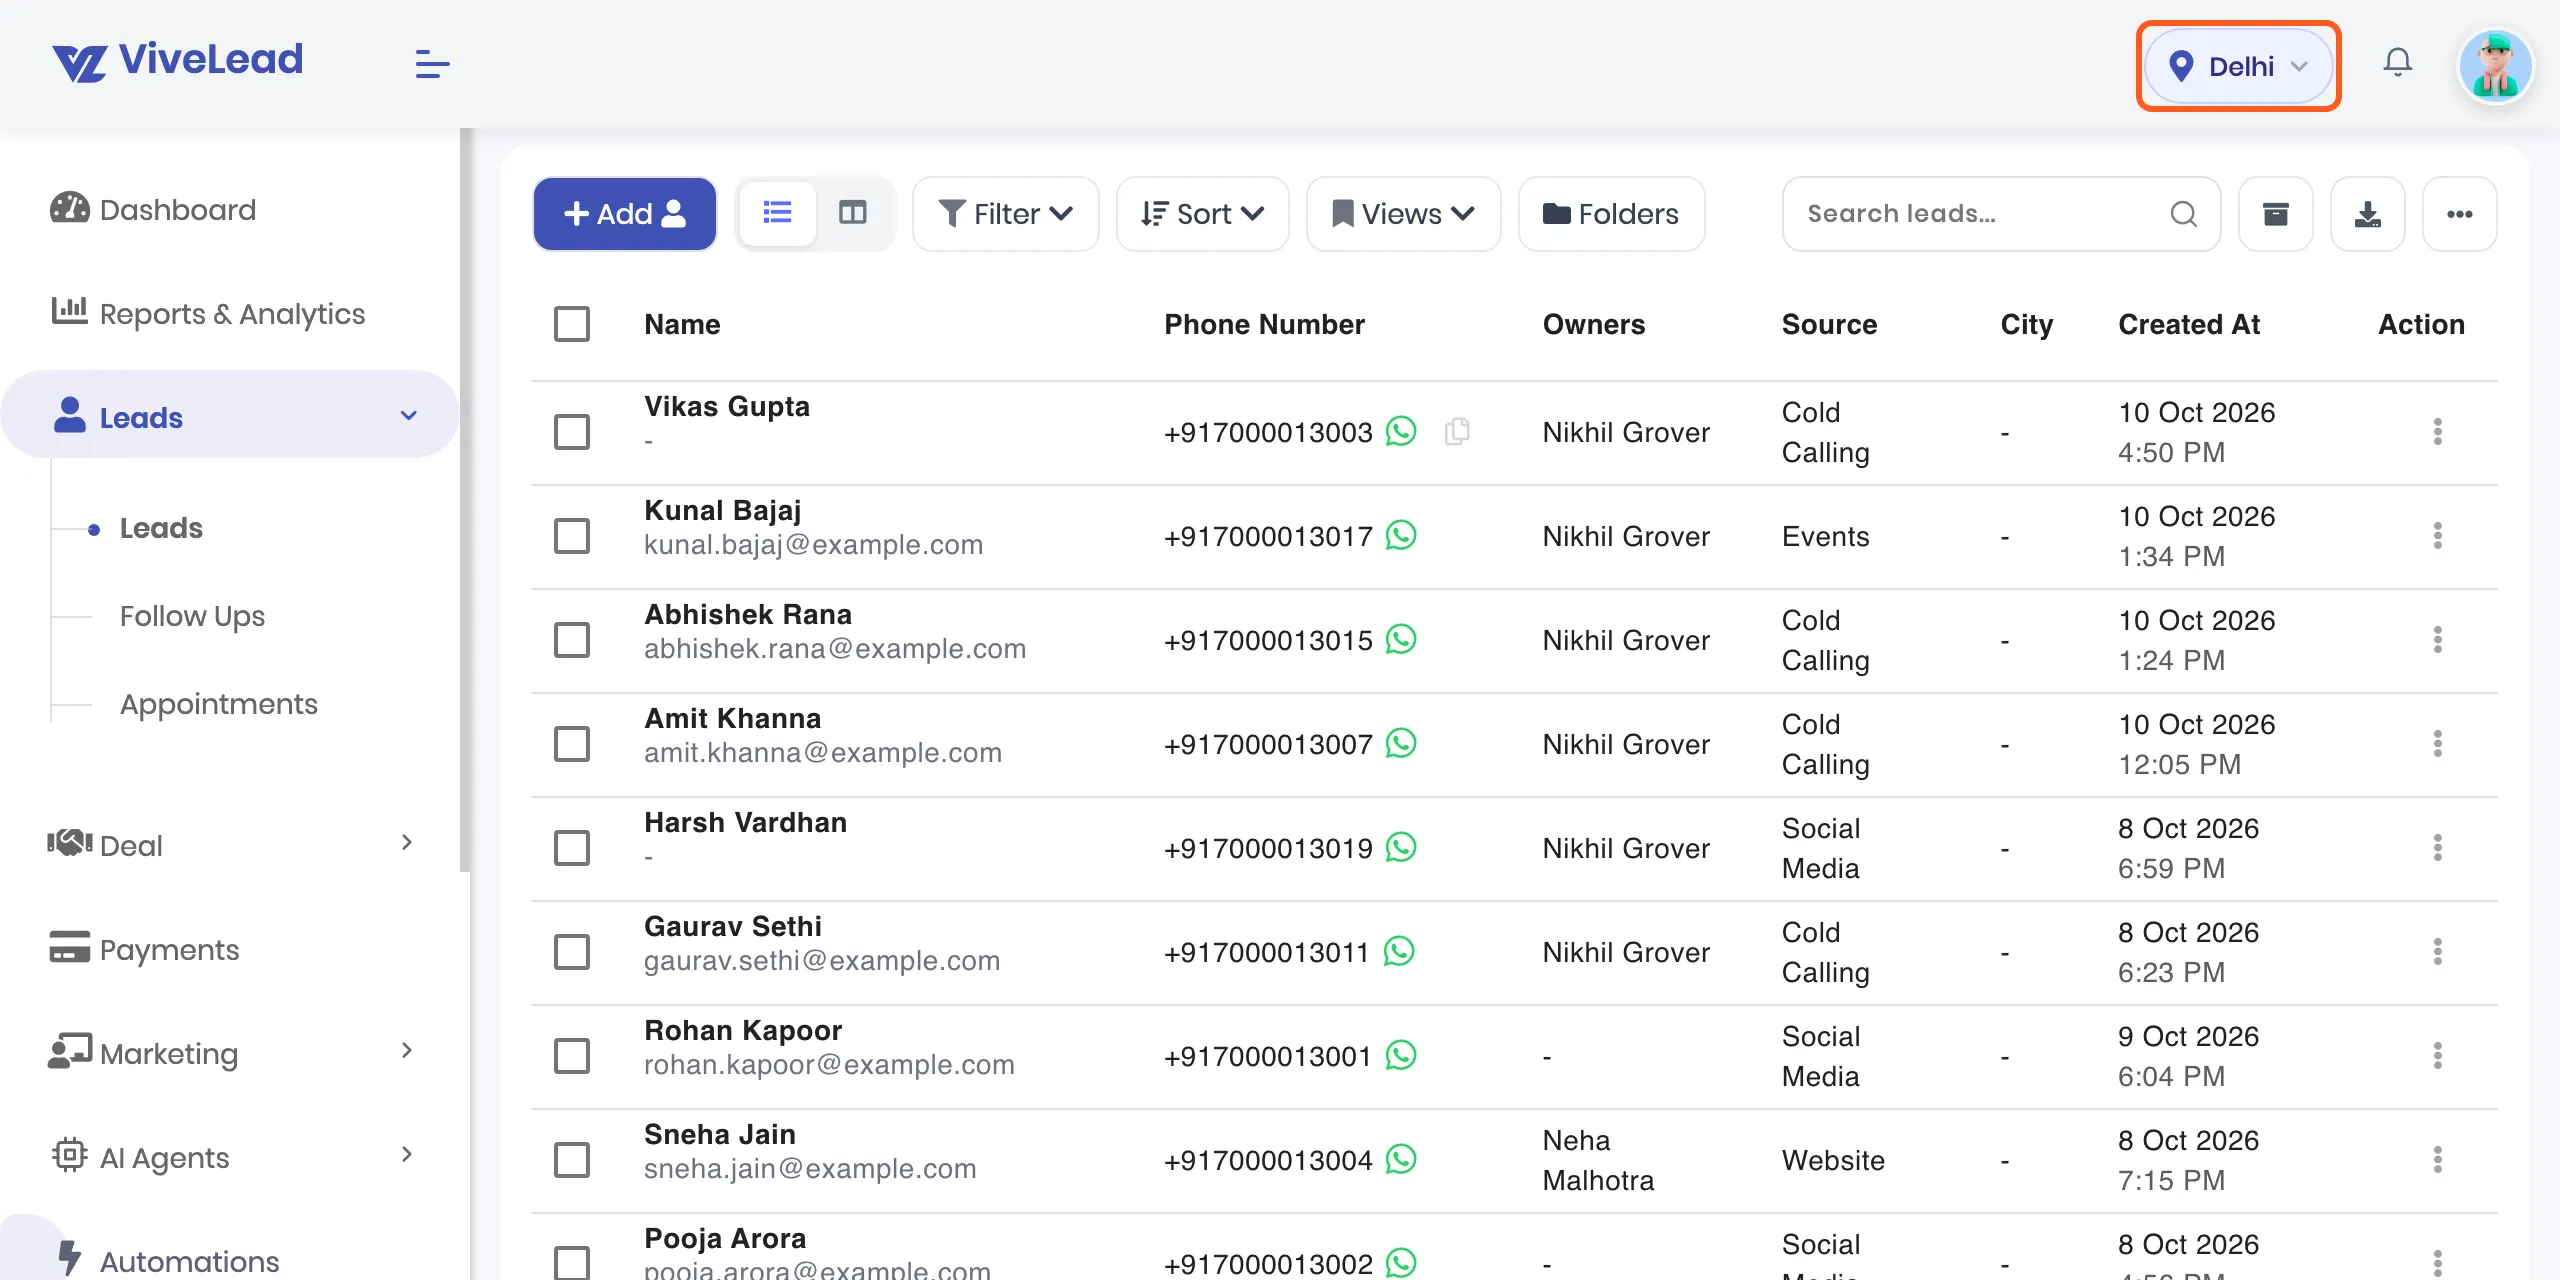
The choice stays as you move between screens. Set it back to All locations to see every branch again.
✅ Done when picking a branch shows only that branch’s leads, and All locations shows them all.
5. Send each branch its own leads
If your leads arrive in one place, like your website form or Facebook ads, you can send each branch’s leads to that branch’s team with a lead routing rule.
Open Controls, then Account Setting, then Lead Routing, then Distribution, and click Add Rule. Under Conditions, pick Location as the field, then Is, Is not or Is one of, then the branches. Under Target Users or Target Teams, pick that branch’s people.
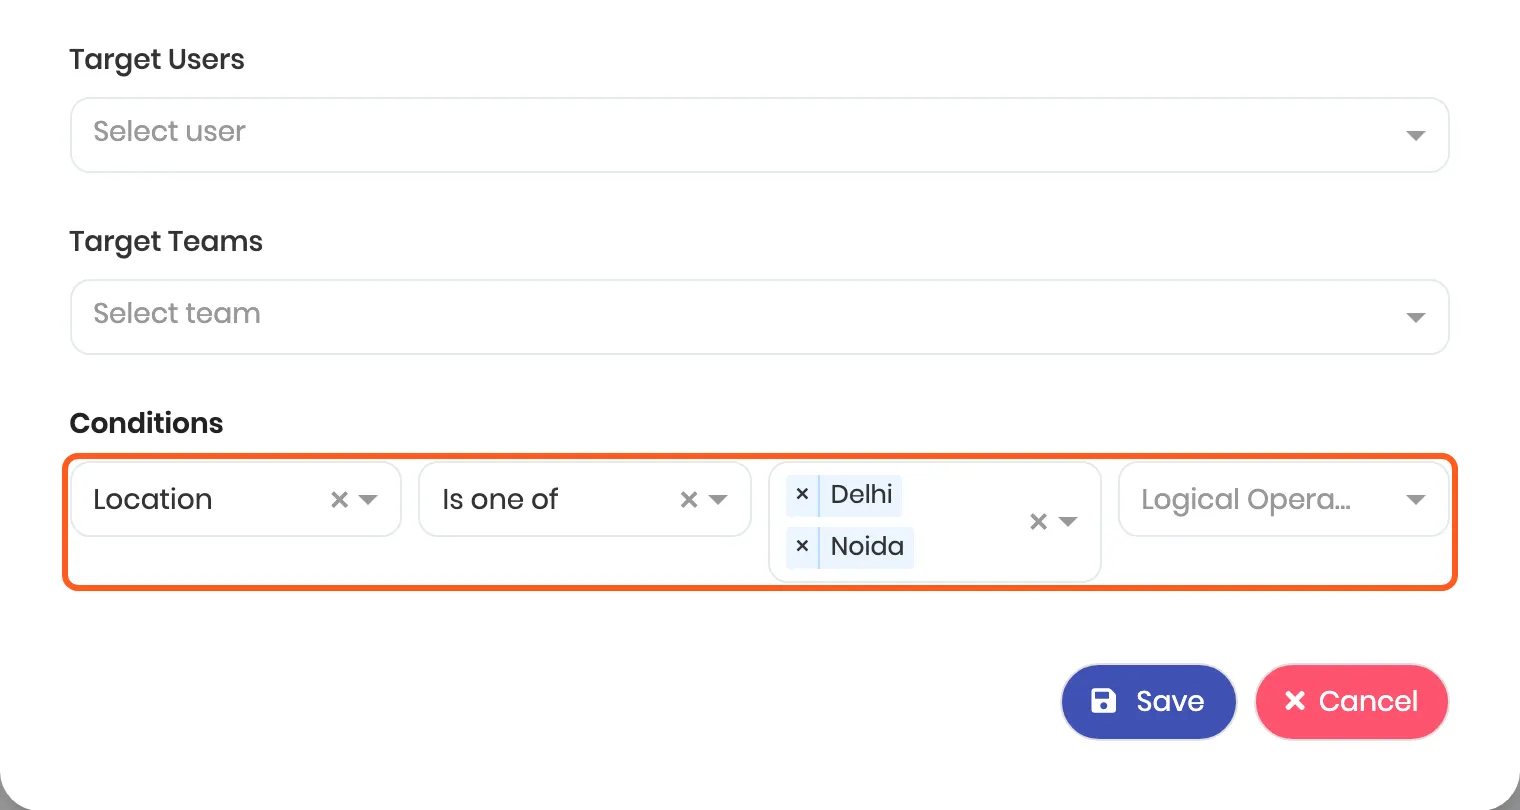
The rule checks the branch the lead is in. A lead added by a Delhi rep, or filed under Delhi from the picker, is a Delhi lead. Location shows in the Field list only once your account has more than one location.
If it does not work
| What you see | Cause | Fix |
|---|---|---|
| No Locations under Controls | Your plan is not Business, or you are not an admin | Check your plan on pricing, or ask your admin |
| No Location field on a user | Your account has only one location | Add a second one in step 1 |
| No location picker at the top | You have only one location | Admins see it once there are two. Others need Also works at |
| LOCATION_ADMIN is not in the Role list | No branch has been added yet | Add one in step 1. The role is created with it |
| A branch manager sees only their own leads | Their role is not LOCATION_ADMIN | Change their role in step 3 |
| A lead list looks short | The picker is on one branch | Set it to All locations |
| A branch will not delete | Users or leads are still in it | Move them to another branch first |
The mobile app has no location picker yet. In the app, people see what their role allows across their branches, and new leads they add go to their own Location.
Related
Still stuck on this step?
Send us what you are seeing and we will sort it out with you.